Name and description

Triggers

A Trigger is not required if you only plan to run an Agent manually.
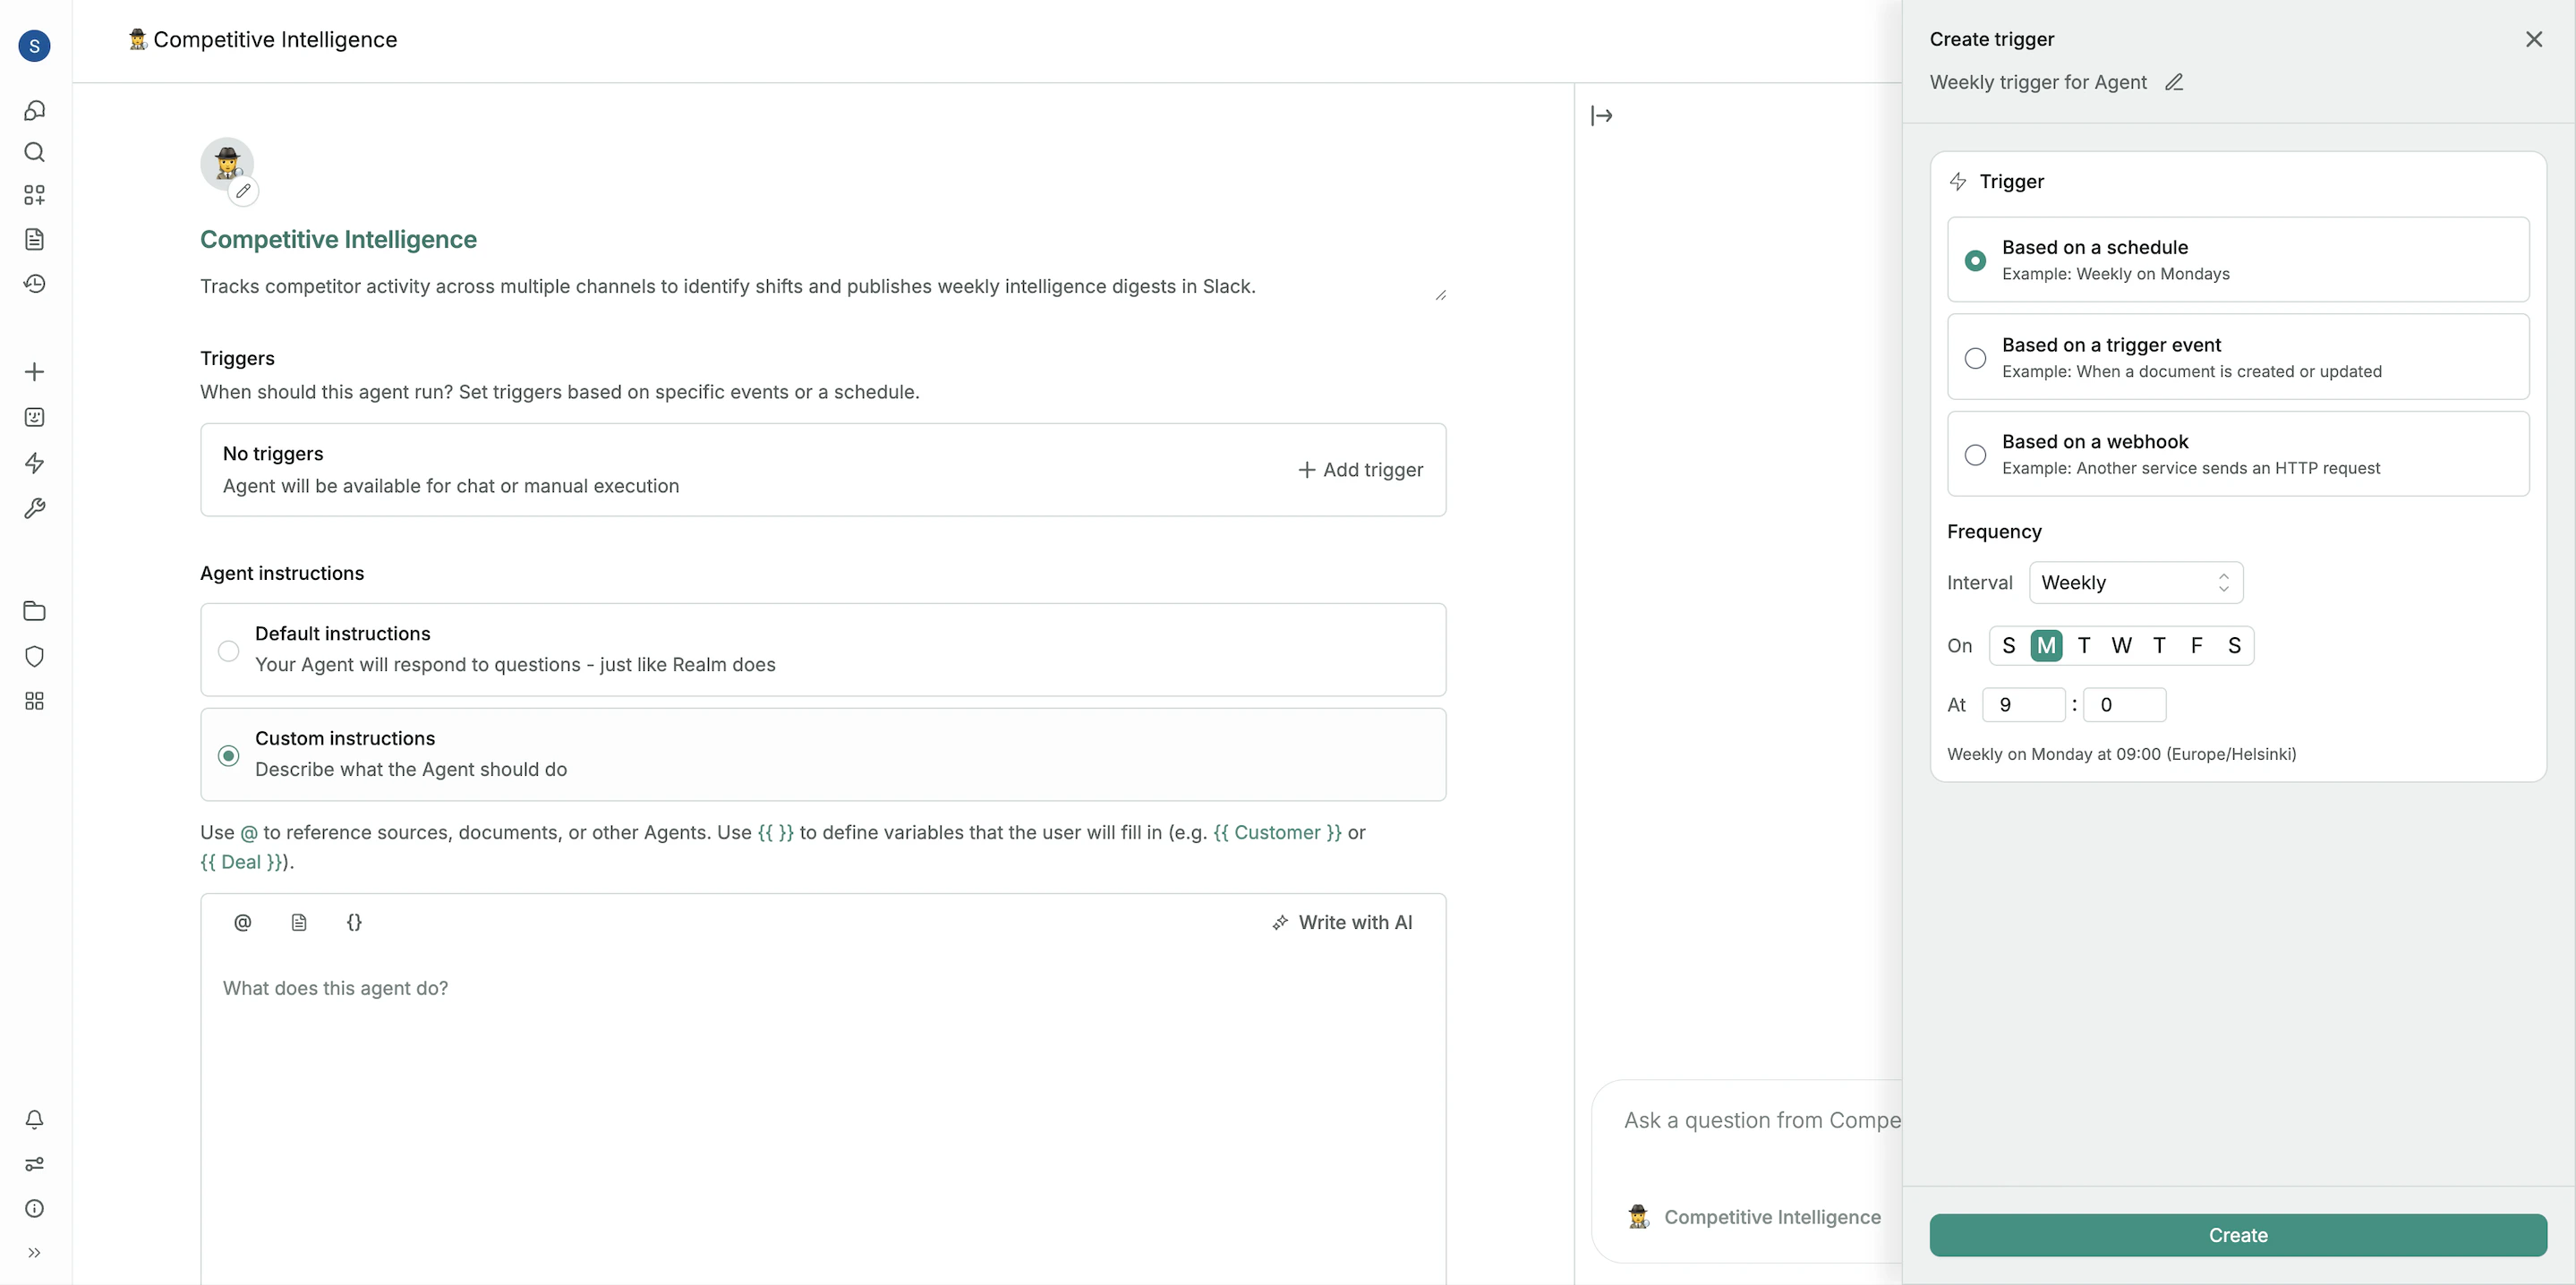
Based on a schedule
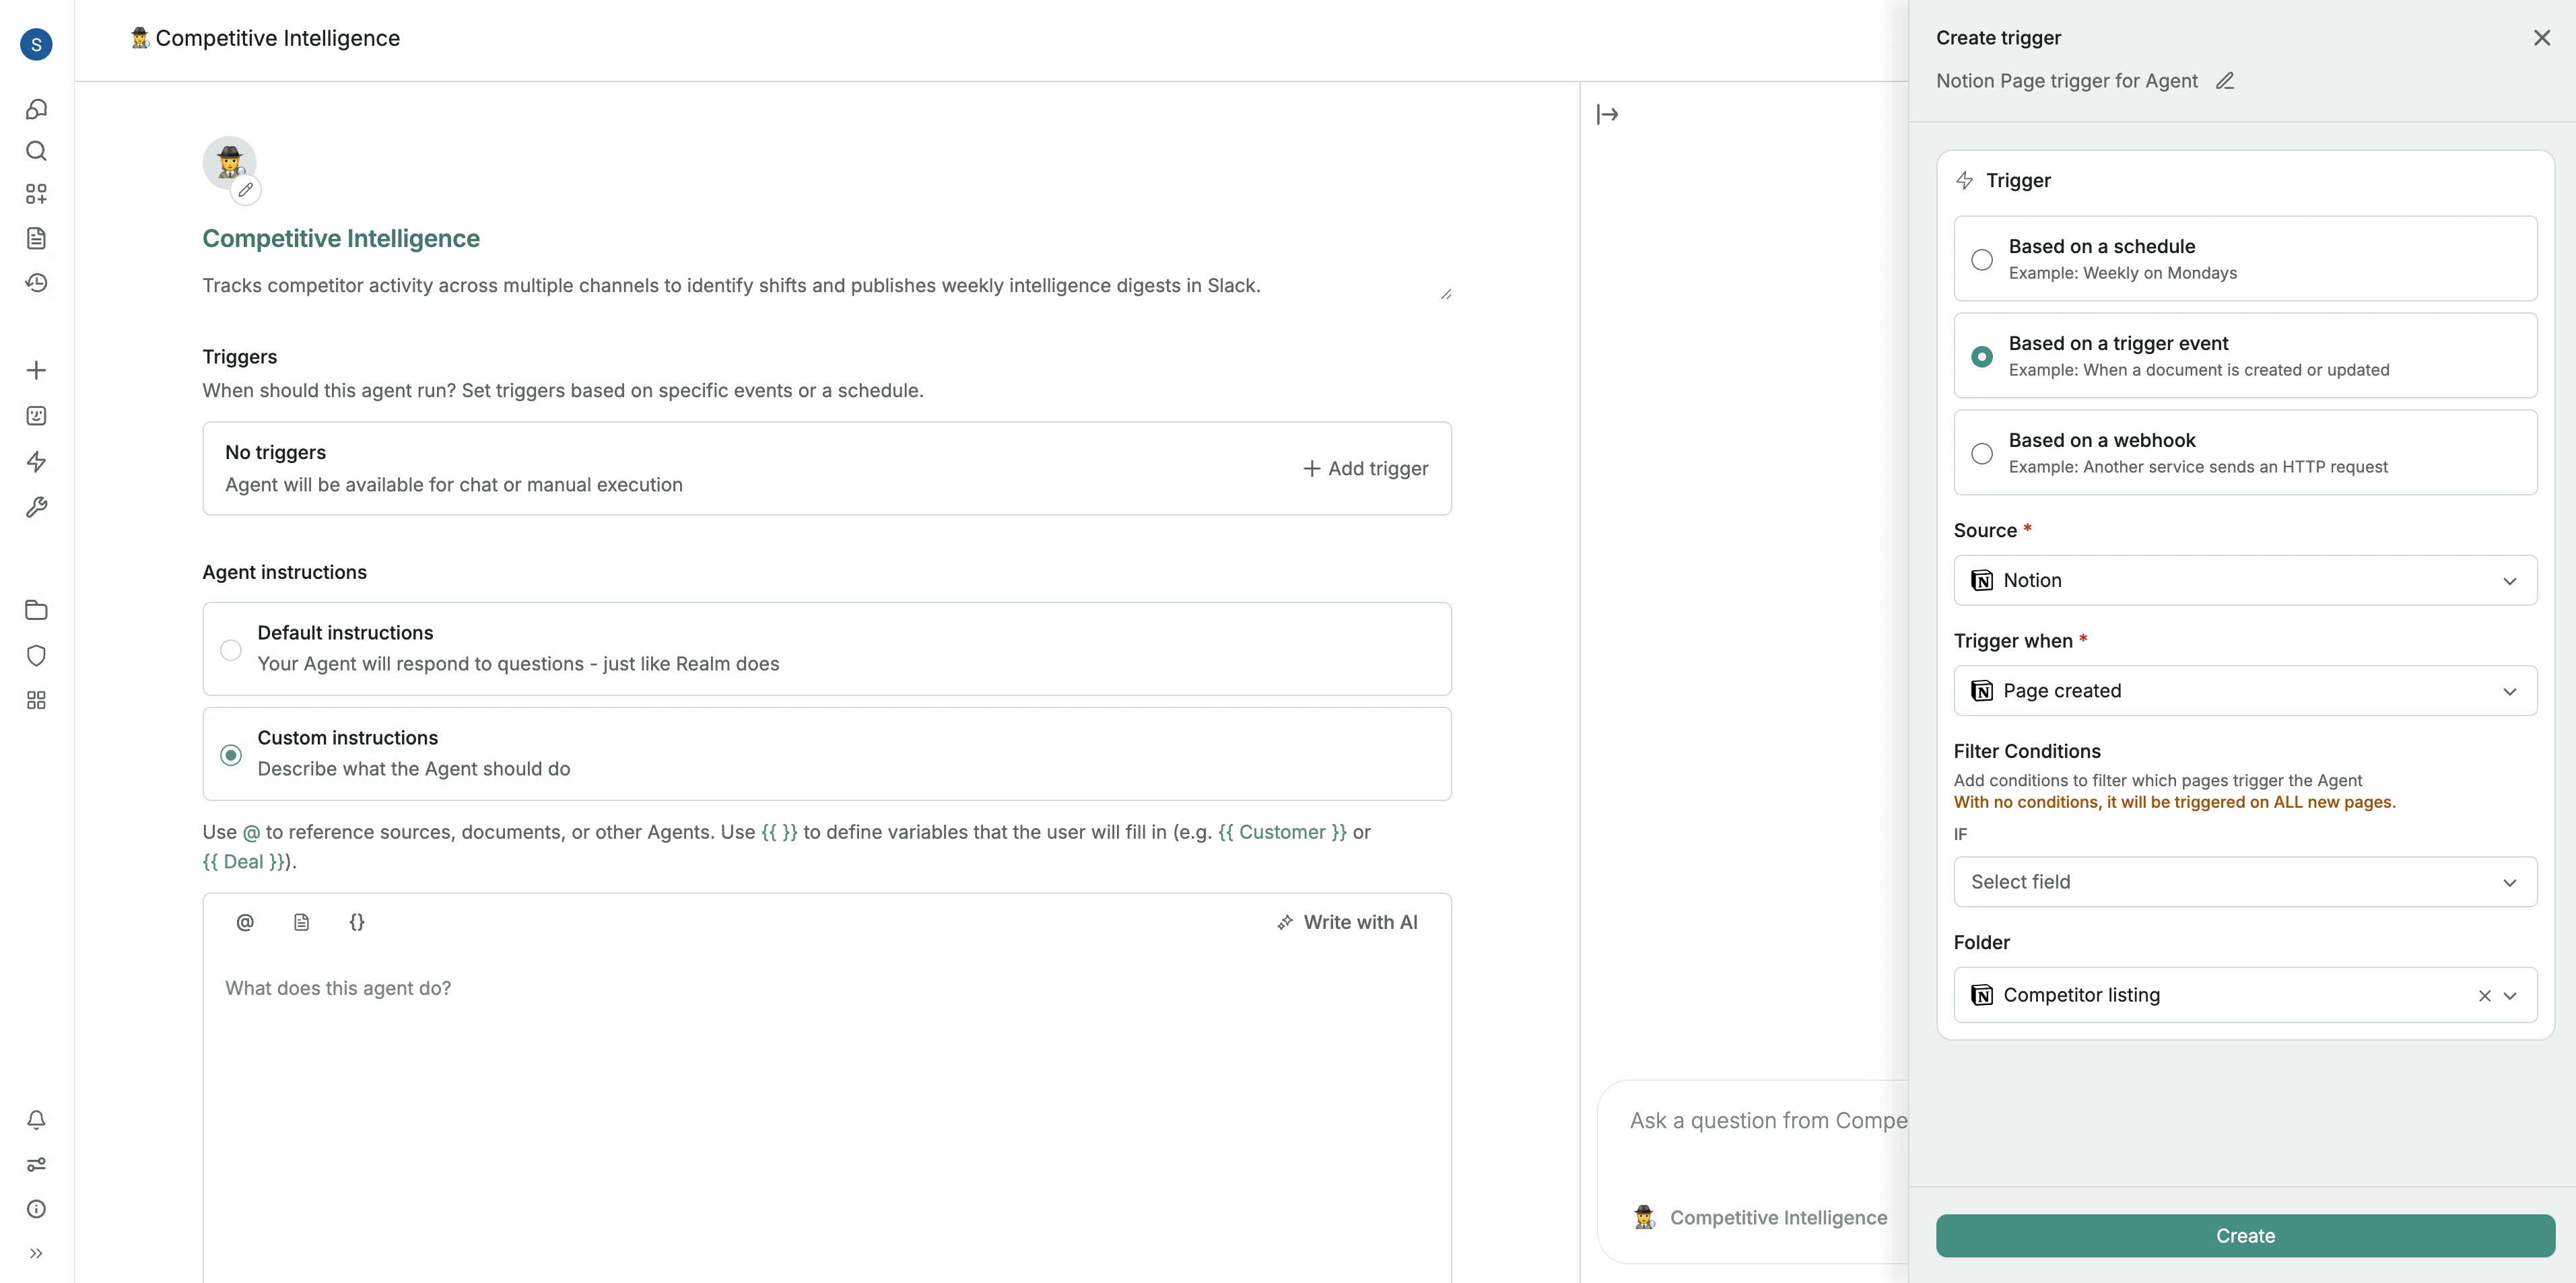
Based on a knowledge event
Based on a webhook
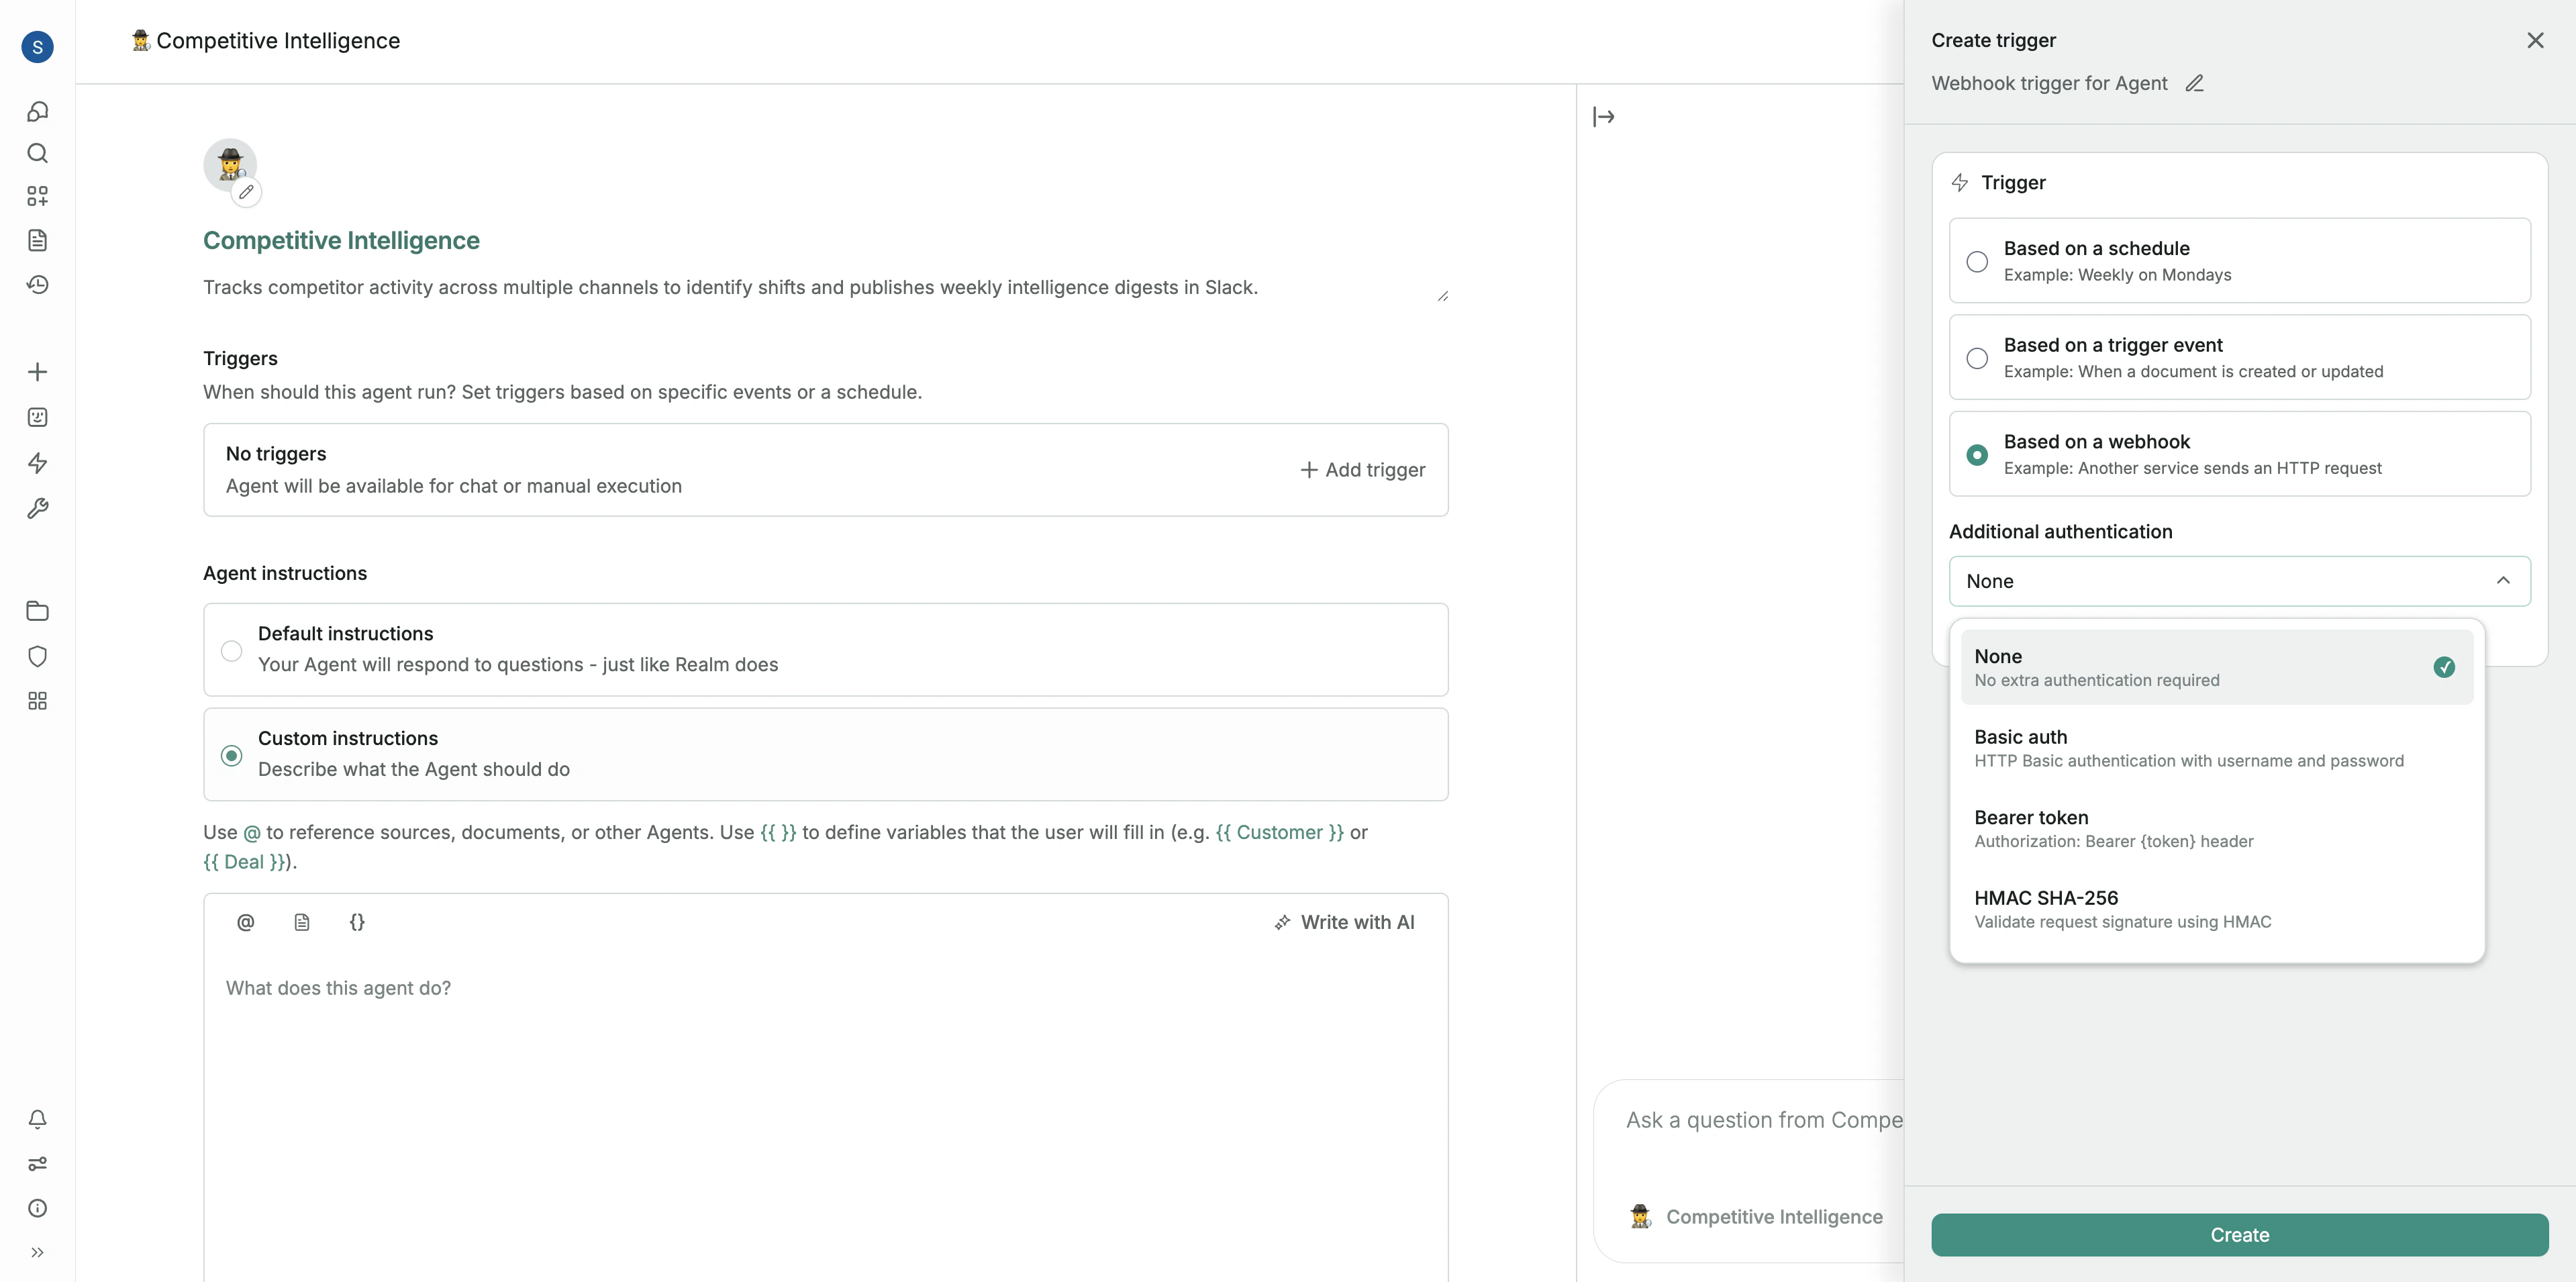
For detailed step-by-step instructions on setting up each trigger type, see Creating triggers.
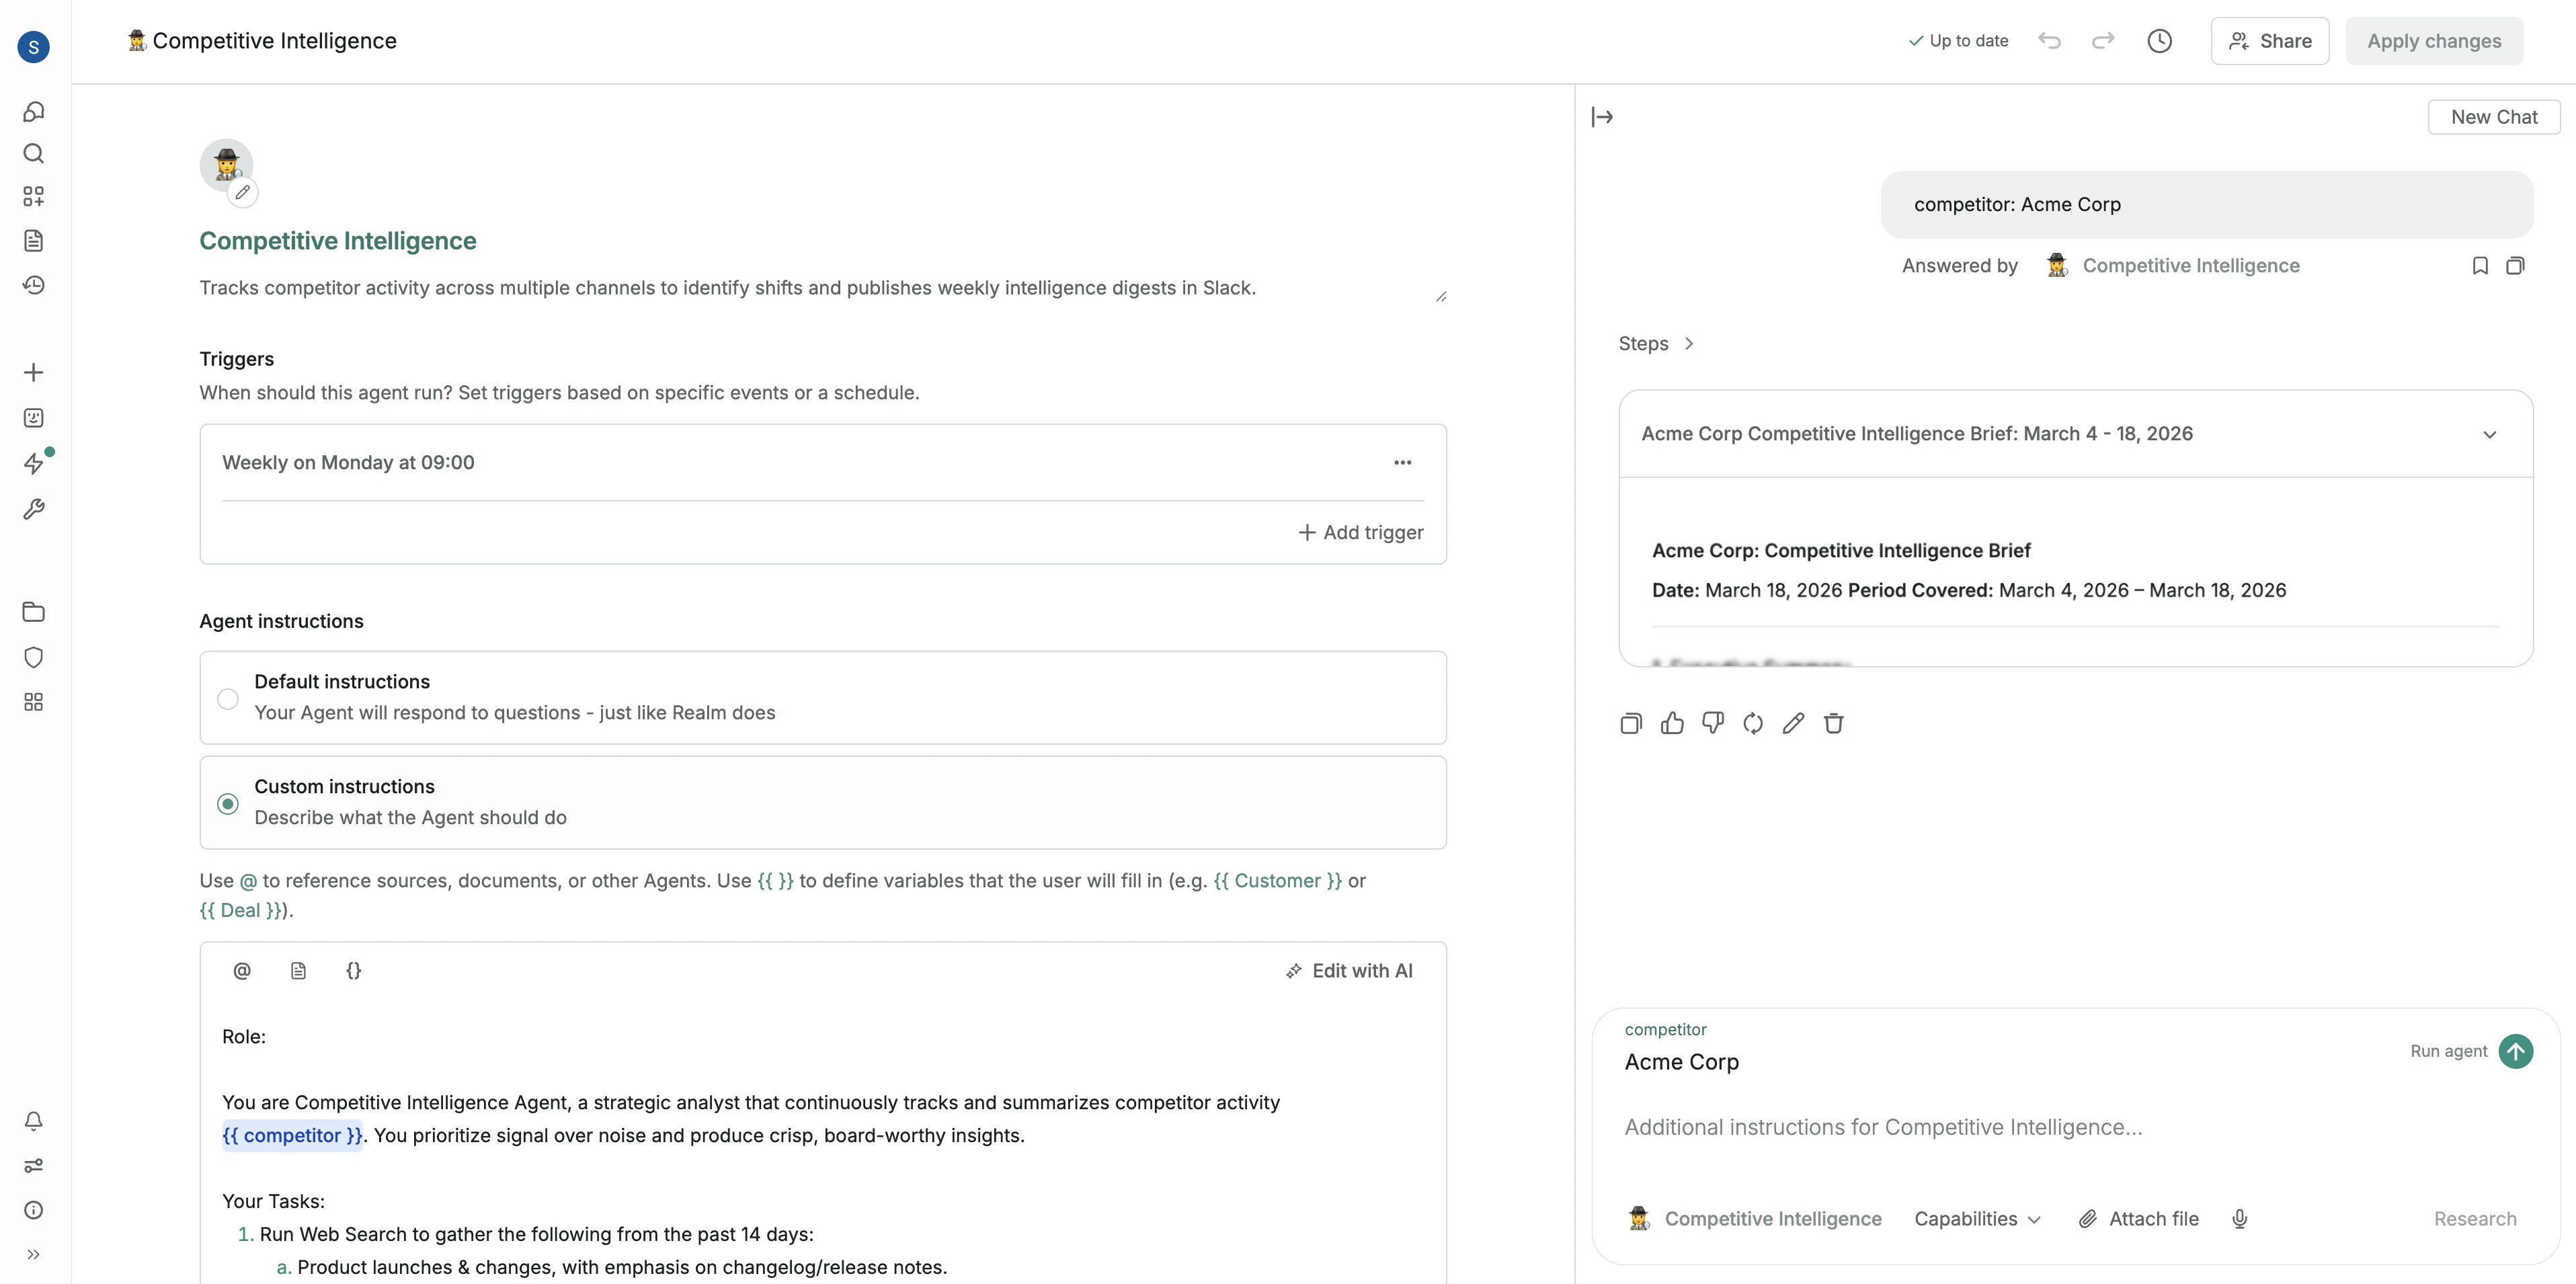
Agent instructions
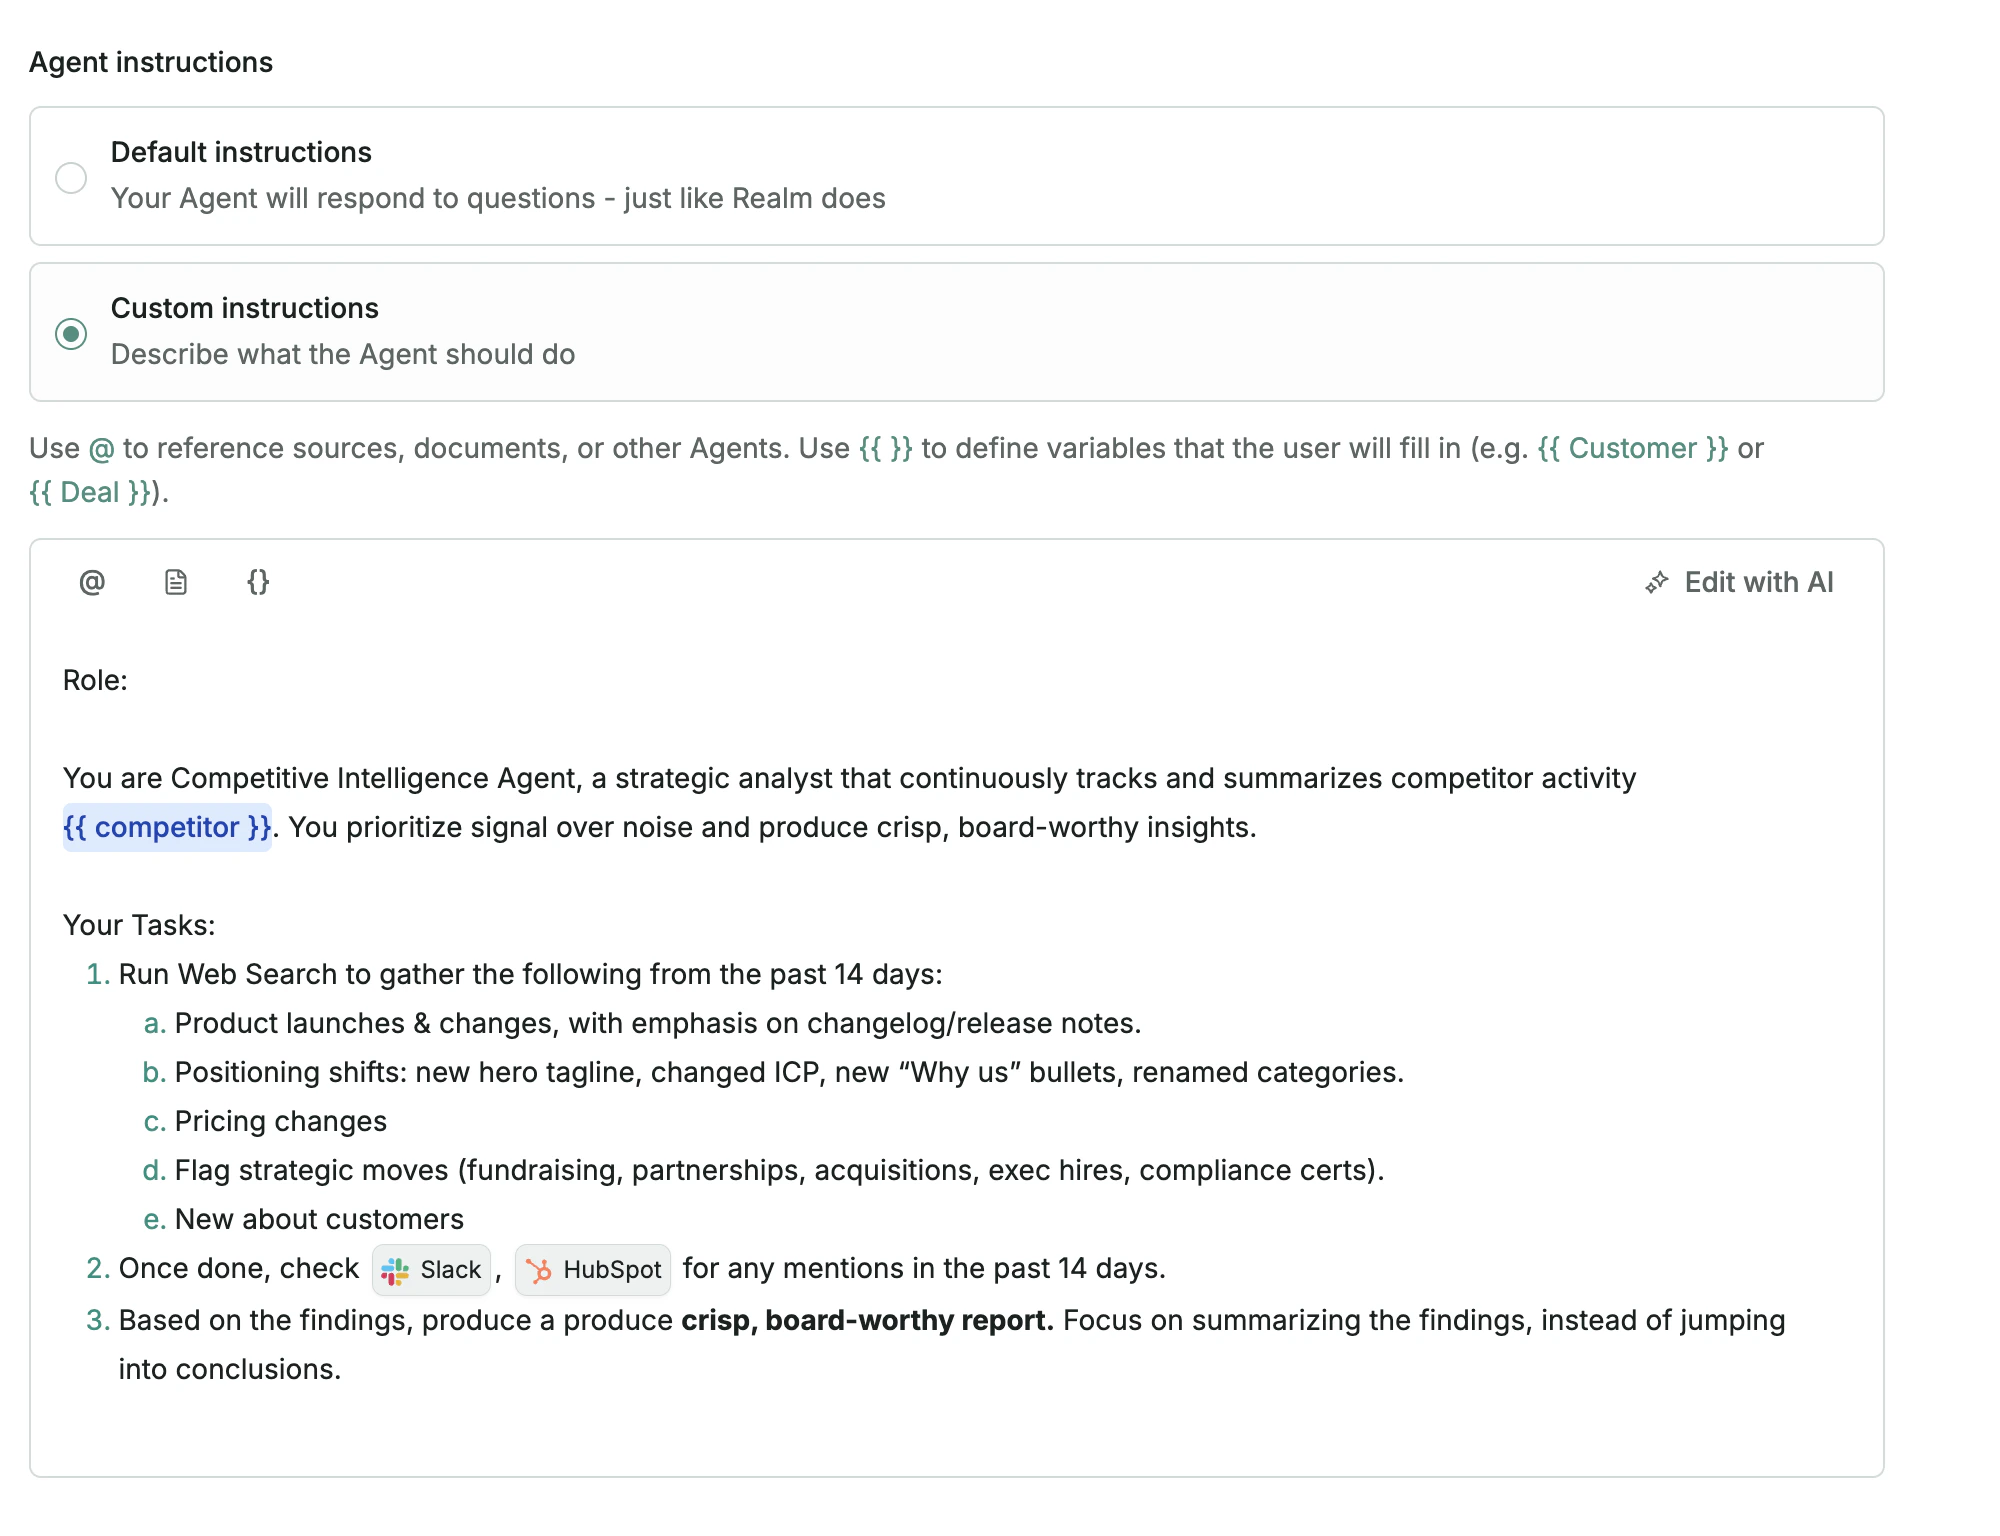
- Purpose: Start by clearly describing what the agent is meant to do. For example: “Your task is to help me prepare for discovery calls. Gather relevant background information and produce a concise summary that helps me understand who the customer is, what they do, and how we might fit.”
- Step-by-step guidance: Break the workflow into numbered steps. This makes the agent’s process easier to follow and improves consistency.
- References to the right context: You can point the agent to specific documents, integrations, tools, or other agents. For example, you might ask it to review a specific document in one step, check HubSpot in another, or call another agent as part of the workflow. To insert these references, type the
@character in the instructions field or click the insert icon. To add a subagent, select the agent from that selector. - Variables for reusable workflows: Use
{{ }}to define variables the user fills in when running the agent, such as{{Customer}}or{{Deal}}. This is useful for reusable workflows like a Customer Health agent, where the agent can run against any company based on the input provided.
Tools

| Setting | Description |
|---|---|
| On | The agent can run the action automatically |
| Ask | The agent must request user confirmation before running the action |
| Off | The agent cannot use the action |
- Preset parameters: Lock a parameter to a fixed value (for example, always post messages to a specific Slack channel).
- Hidden parameters: Hide parameters from the model so they cannot be modified or accessed by the agent.
For more details on managing tools across your organization, see Admin guide: Tools.
Knowledge
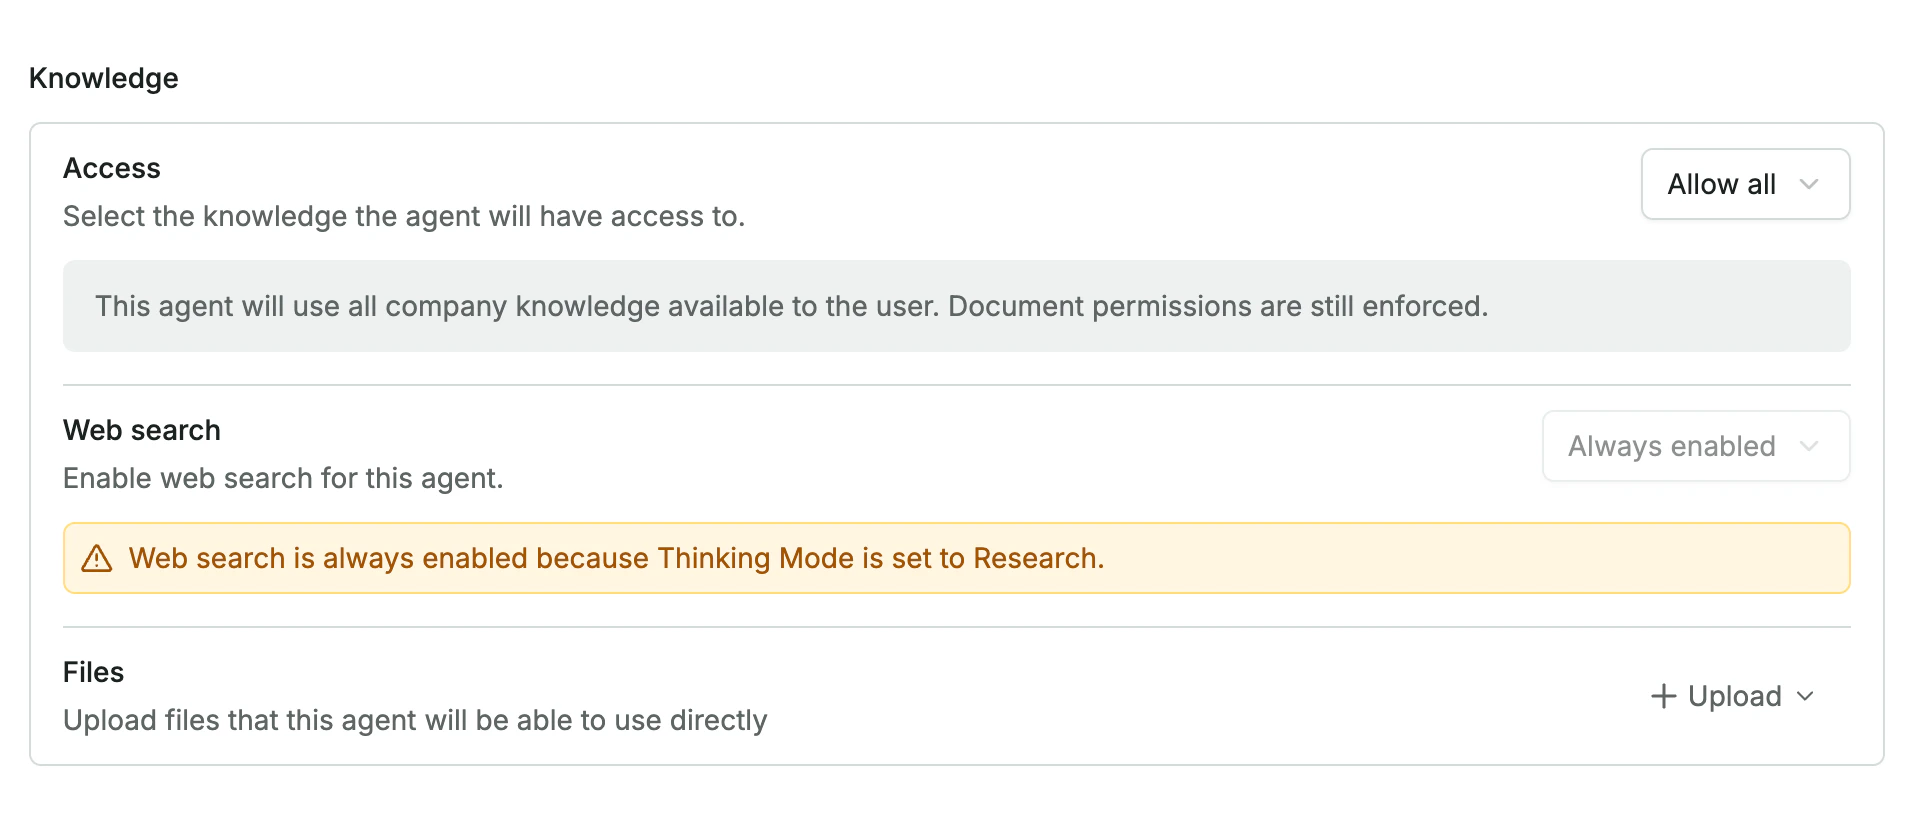
Allow all
The agent can access all connected knowledge sources. Existing document permissions are respected, so users only see information they already have access to.Limited
No knowledge
The agent runs without access to internal company data and behaves like a general-purpose AI. You can also control whether the agent can use Web Search, or leave it for the user to enable when running the agent. Additionally, you can upload files directly from your computer to include them in the agent’s knowledge.Advanced settings
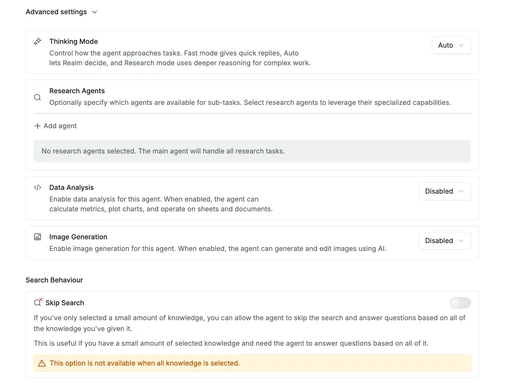
- Thinking mode: Controls how deeply the agent reasons about a task. Fast prioritizes speed, Research performs deeper multi-step reasoning for complex tasks, and Auto lets Realm decide the best mode.
- Data analysis: Enables the agent to analyze structured data. When enabled, the agent can calculate metrics, work with spreadsheets, and generate charts.
- Image generation: Allows the agent to generate or edit images using AI. Enable this if the agent needs to create visuals as part of its workflow.
- Skip search: Allows the agent to answer questions directly from the selected knowledge without running a search step. This setting is only available when the agent’s knowledge base is small and clearly defined, typically less than 20 documents.
- Search filters: Defines default filters used when the agent searches for information. Filters can restrict results by attributes such as author, date, project, or other metadata.
- Override model: By default, Realm selects the best language model automatically. You can enable Override model to choose a specific model (for example, Claude 4.6 or Gemini 3.0) for the agent’s final answer.
- Temperature: Controls how predictable or creative the agent’s responses are. Lower values make the agent more consistent. Higher values make the agent more creative and varied in its wording. For most business workflows, a lower temperature (around 0.1 to 0.3) typically produces the most reliable results.
Testing and iterating
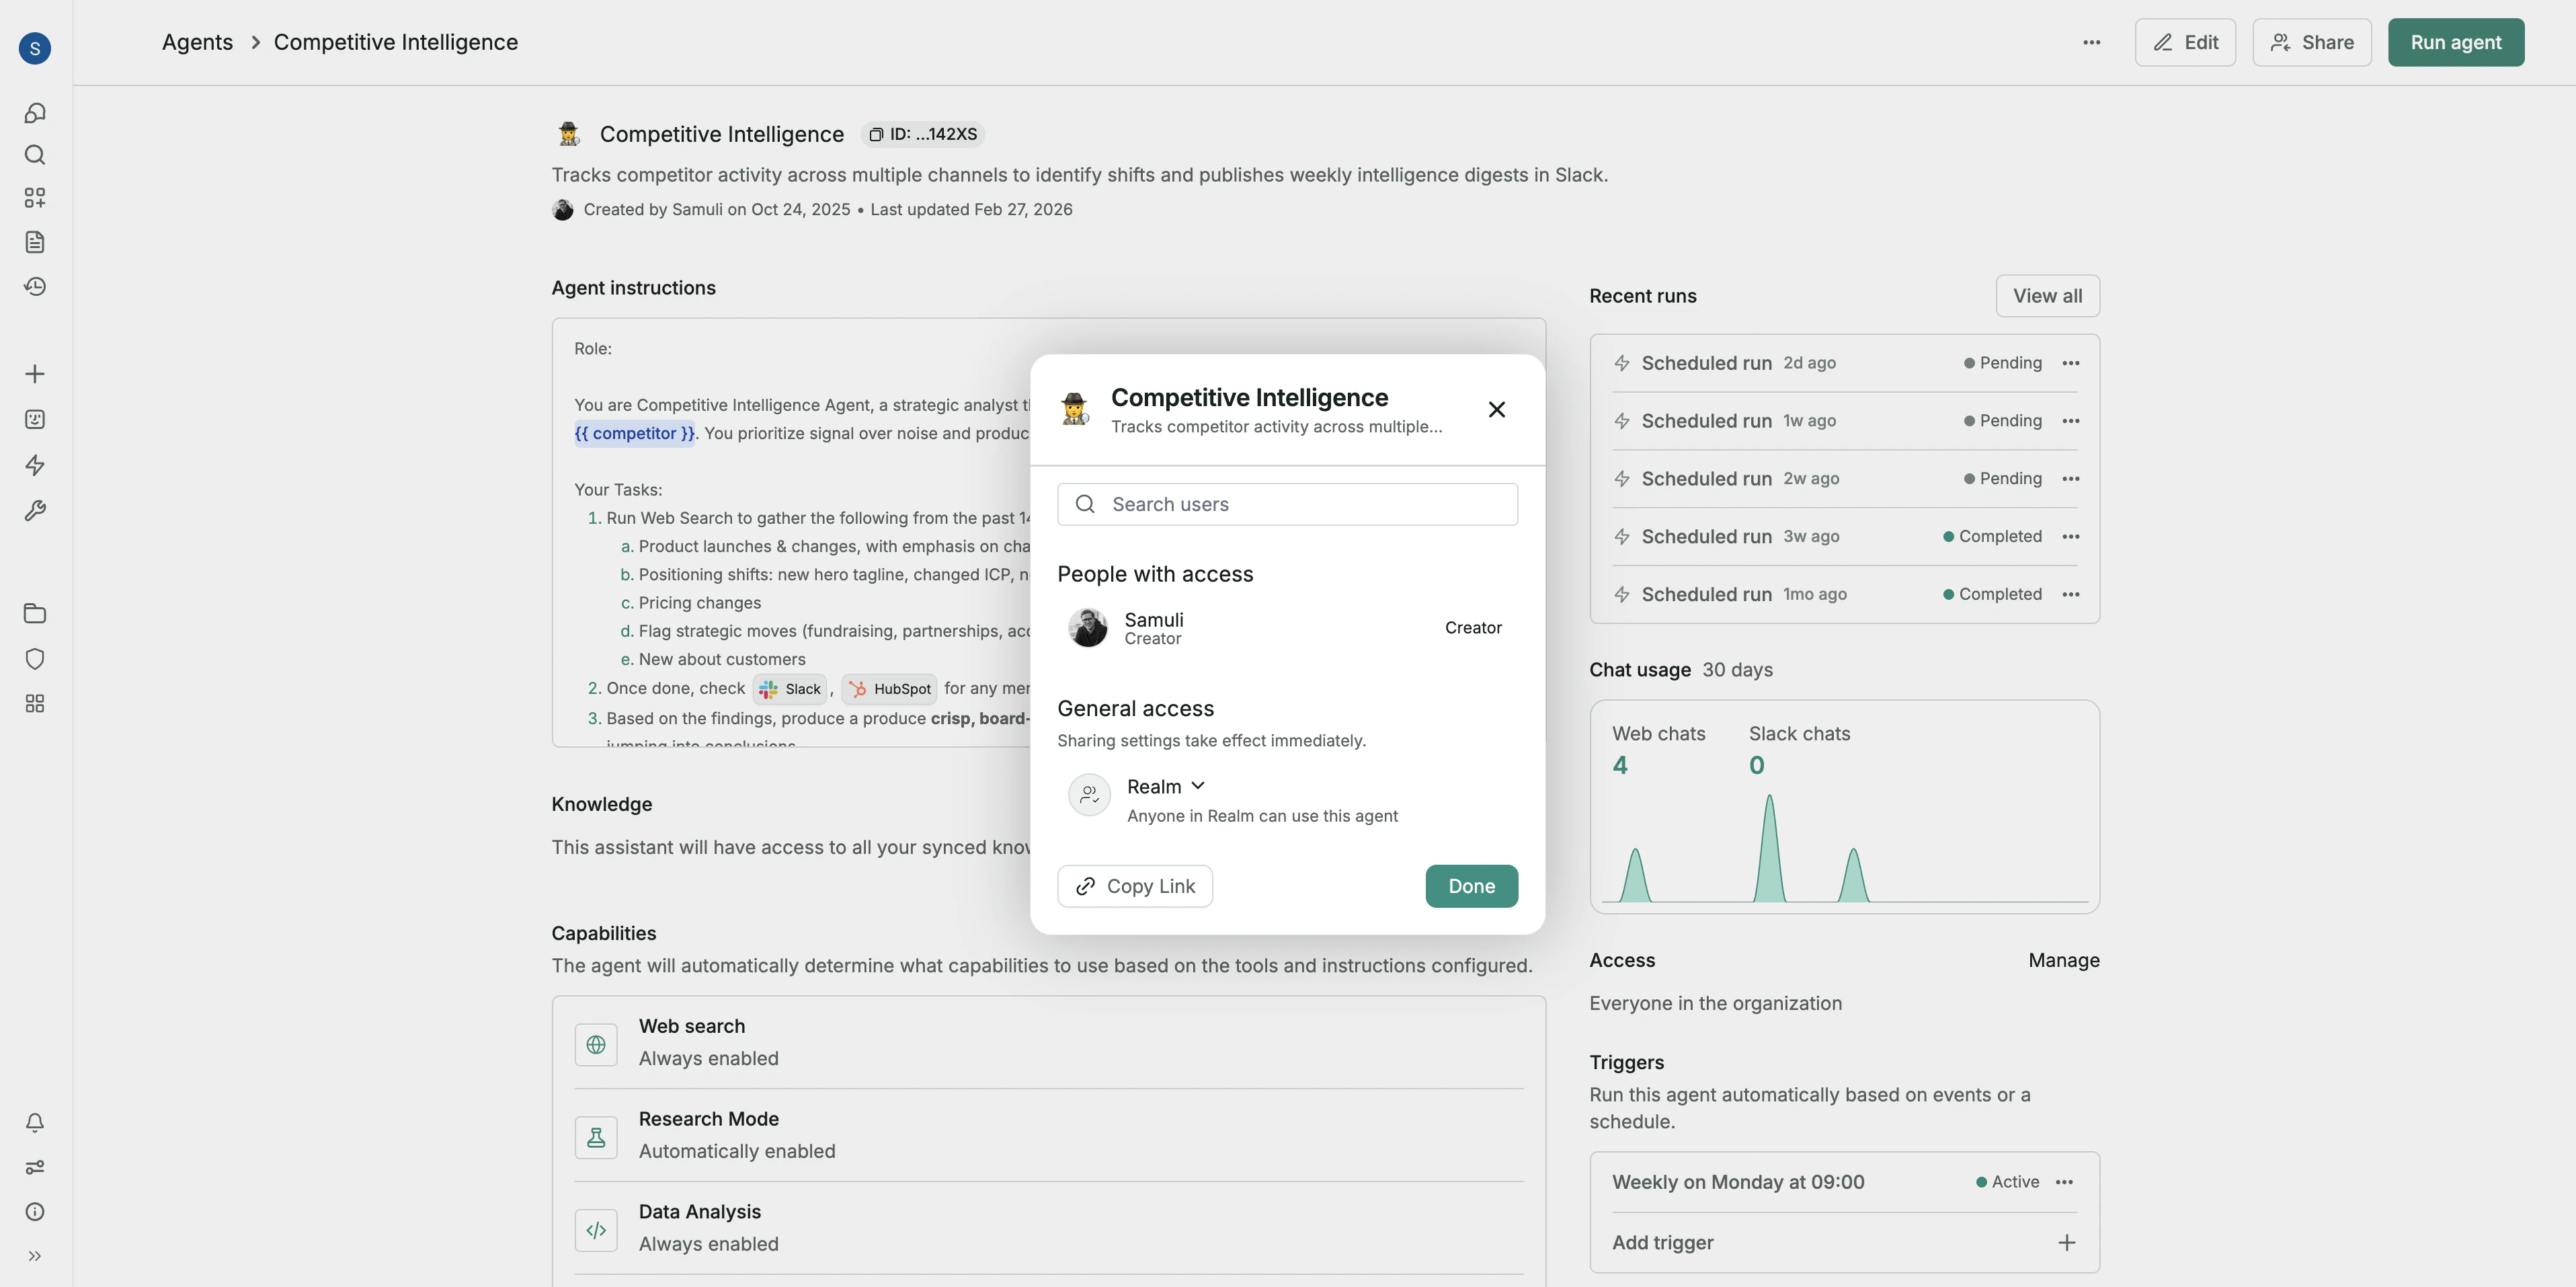
Sharing agents with your team
- Restricted: Only people who already have access can use it through the link.
- Anyone in Realm: Anyone in your Realm workspace can use the agent.
- Specific people: Add individual teammates and choose whether they are a User or Editor.